
Build a Private WoW Server with PlayerBots and AI Chat Using CMangos on Ubuntu 24.04
Sunday, September 14, 2025Build a Private WoW Server with PlayerBots and AI Chat Using CMangos on Ubuntu 24.04
Imagine stepping into Azeroth not as a lone adventurer, but as the hero of your own living, breathing world—one populated by intelligent companions who can chat with you, join your quests, and adapt to your playstyle. This isn't science fiction; it's entirely possible with today's technology. In this comprehensive guide, we'll build a private World of Warcraft server running the Wrath of the Lich King expansion, complete with AI-powered PlayerBots that transform the classic MMO experience into something truly magical.
Why Build a WoW Server with AI Bots?
The appeal of running a private WoW server with AI-controlled bots goes beyond mere technical achievement. Imagine logging into Azeroth and finding towns bustling with activity, dungeons you can run without waiting for friends, and companions who can hold meaningful conversations with you. This isn't just about playing WoW alone—it's about creating a living, breathing world where you're never truly alone.
After experimenting with various bot systems, I've found that CMangos with PlayerBots offers the most realistic and engaging experience. What makes it truly special is the ability to connect these bots to a local AI system that dramatically improves their conversational abilities. The result is an experience that comes remarkably close to playing with real people—sometimes even more enjoyable, as the bots are always available, never toxic, and endlessly patient.
What You'll Need
Hardware Requirements
- A dedicated machine or VM with at least 4GB RAM (8GB recommended)
- Dual-core CPU or better (quad-core recommended for smooth bot operation)
- At least 20GB of free disk space for the server and data files
- Ubuntu 24.04 LTS installed and updated
Software Requirements
- Ubuntu 24.04 LTS with sudo access
- Internet connection for downloading repositories and data files
- Basic familiarity with Linux command line operations
- A World of Warcraft Wrath of the Lich King client (3.3.5a) for connecting to your server
⚠️ Important Legal & Ethical Considerations
Before proceeding, it's important to understand that private WoW servers exist in a legal gray area. Blizzard Entertainment has historically taken action against private servers. To minimize risks:
- Keep your server private and non-commercial
- Never charge money for access
- Be transparent with players that they're interacting with AI
- Respect player privacy and don't store personal conversation data
This guide is for educational purposes only. Always respect intellectual property rights.
1. System Prerequisites
Installing Dependencies
First, we need to install the necessary development tools and dependencies. Open a terminal and run the following command:
sudo apt install build-essential gcc g++ automake git-core autoconf make patch p7zip-full libmysql++-dev mysql-server libtool libssl-dev grep binutils zlib1g-dev libbz2-dev cmake libboost-all-dev g++-12This command installs all the compilers, libraries, and tools needed to build the CMangos server from source. The installation may take a few minutes depending on your system.
Creating a Dedicated User
For security and organization, we'll run our server under a dedicated user account. Create the necessary directories and user:
sudo mkdir /games

sudo useradd wow -m -d /games/wow

sudo passwd wow
Set a strong password for the wow user when prompted. Now switch to this user for the remainder of the setup:
su wow

cd ~
💡 Pro Tip: The su wow command doesn't automatically switch to the user's home directory. Always follow it with cd ~ to ensure you're in the right location.
Setting Up Directory Structure
In the home folder, we're making a new folder named cmangos with a subfolder named build:
mkdir -p /games/wow/cmangos

cd /games/wow/cmangos
This creates a clean directory structure for our server files and build process.
2. Building the Server
Cloning Repositories
Now we'll clone the necessary repositories and compile the server. Create a working directory and clone the CMangos repositories:
git clone https://github.com/cmangos/mangos-wotlk.git mangos

git clone https://github.com/cmangos/wotlk-db.git

git clone https://github.com/cmangos/playerbots
This downloads the core server software, database scripts, and the PlayerBots module that will bring our world to life with AI companions.
Configuring the Build
Create a build directory and configure the build with CMake. We'll enable PlayerBots and AHBot (Auction House Bot) during this step:
mkdir build

cd build

cmake ../mangos -DCMAKE_INSTALL_PREFIX=/games/wow/cmangos -DBUILD_PLAYERBOTS=ON -DBUILD_AHBOT=ON -DPCH=1 -DDEBUG=0
The -DBUILD_PLAYERBOTS=ON flag is crucial—it enables the AI companion system that makes this setup special!
Compiling the Server
Check how many CPU cores your system has available for faster compilation:
lscpuLook for "CPU(s)" in the output and use that number for the next command. This will significantly speed up the compilation process:
make -jXReplace X with your core count. This step will take some time (10-60 minutes depending on your hardware). You may see various warnings during compilation, but these are generally not cause for concern.
⏱️ Time for a Break! This is the perfect time to grab a coffee or stretch your legs. The compilation process requires significant CPU resources and can't be rushed.
Once compilation completes, install the server files:
make installCreate additional directories we'll need later:
cd /games/wow/cmangos

mkdir logs data
Configuration Files
Copy the configuration file templates and rename them:
cp etc/mangosd.conf.dist etc/mangosd.conf

cp etc/realmd.conf.dist etc/realmd.conf

cp etc/anticheat.conf.dist etc/anticheat.conf

cp etc/aiplayerbot.conf.dist etc/aiplayerbot.conf

cp etc/ahbot.conf.dist etc/ahbot.conf
These configuration files control everything from server behavior to bot AI settings. We'll customize them in later steps.
3. Setting Up the Databases
MySQL Configuration
Ubuntu 24.04 automatically sets up MySQL with a root password. First, log in as root and set your own password:
sudo mysql

ALTER USER 'root'@'localhost' IDENTIFIED WITH mysql_native_password BY 'yourpassword';

EXIT;
Secure your MySQL installation:
mysql_secure_installationRecommended answers to the security questions:
- N for unix_socket
- N to Change root password
- Y to remove anonymous users
- Y to allow root login remotely
- Y to remove the test database
- Y to reload privilege table
Creating Databases and Users
Log back into MySQL and create a dedicated user for the WoW server:
mysql -u root -p

CREATE USER 'wow'@'localhost' IDENTIFIED BY 'mangos' WITH MAX_QUERIES_PER_HOUR 0 MAX_CONNECTIONS_PER_HOUR 0 MAX_UPDATES_PER_HOUR 0;

GRANT USAGE ON * . * TO 'wow'@'localhost';

EXIT;
This creates a dedicated user with unlimited queries and connections—perfect for our AI-powered server that will handle many simultaneous bot interactions.
Running the Database Installation Script
Navigate to the database directory and run the installation script:
cd /games/wow/cmangos/wotlk-db

sudo ./InstallFullDB.sh
Choose option 9 when prompted. This creates a configuration file that we need to edit:
nano InstallFullDB.configFind and modify these lines to match your setup:
CORE_PATH="/games/wow/cmangos/mangos"

AHBOT="YES"

PLAYERBOTS_DB="YES"
Save the file (Ctrl+X, Y, Enter) and run the script again:
sudo ./InstallFullDB.shThis time, choose the following options in sequence:
- Option 4 (root login)
- Enter your root password
- Option 1
- DeleteAll
- Press Space key
- Option 9
- {Note versions of DB now show in the top}
- Option 9 again
This process creates and populates all the necessary databases for your server, including tables for bot behavior and AI interactions.
Configuring the Realm
Now we need to tell the server where to find your realm. Log back into MySQL:
mysql -uwow -pmangos

use wotlkrealmd
Delete the existing realm entry and add your own (replace 'Classic-With-Bots' and the IP address with your preferred values):
DELETE FROM realmlist WHERE id=1;

INSERT INTO realmlist (id, name, address, port, icon, realmflags, timezone, allowedSecurityLevel)

VALUES ('1', 'Classic-With-Bots', '192.168.1.81', '8085', '1', '0', '1', '0');
Type EXIT; to leave MySQL.
⚠️ Important: Make sure to replace '192.168.1.81' with your actual server IP address. This is the address your WoW client will connect to.
4. Server Configuration
Configuring Server Directories
We'll need to change a couple of variables in the configuration files we copied earlier in the etc folder:
cd /games/wow/cmangos/etcType this to show all the files in this folder:
ls -laOpen the mangos.conf file with nano, or any other text editor you might prefer:
nano mangosd.confThese variables need to be changed so they will look something like this:
DataDir = "/games/wow/cmangos/data"

LogsDir = "/games/wow/cmangos/logs"
Same thing for the realmd.conf file:
nano realmd.confSet:
LogsDir = "/games/wow/cmangos/logs"Don't forget to save the config files before exiting.
5. Import the Data Files
Downloading and Extracting Game Data
Now we need to download and extract the game data files:
cd /games/wow/cmangosThis will download a zipped file that contains all the data files we need:
wget https://cdn.puntenel.nl/files/var/compressed/3.3.5a/data.7zUnpack the 7z file and set permissions:
7z x data.7z -odata

chmod -R 755 data
Once the unpacking completes it is safe to remove the zipped file:
rm data.7z📁 What are these data files? These files contain the actual game assets—models, textures, sounds, and world data—that make World of Warcraft visually and audibly rich. Without them, your server would be a text-based adventure!
6. Running the Server
Starting the Services
Now we're going to start the server, and hopefully everything should run without any errors:
cd /games/wow/cmangos/binRealmd is the process that will allow us to log on to the server. Once you started it, you'll want to keep it running, so to continue you will need to open up a second terminal window and continue from there:
./realmdIn this new terminal window we're going to login as user wow and cd into the correct folder:
su wow

cd ~/cmangos/bin
Typing ./mangosd should be sufficient:
./mangosdBut optionally you could also specify what config files it should use, in case you want to have different ones. You can do this like so:
./mangosd -c /games/wow/cmangos/etc/mangosd.conf -a /games/wow/cmangos/etc/realmd.conf🎉 Success! If you see both servers running without errors, congratulations! You now have a working WoW server. The next steps will bring it to life with AI companions.
7. Creating Your Account
Setting Up Your Administrator Account
With the servers running, you can now create your account. In the terminal where mangosd is running, type:
account create yourusername yourpassword

account set gmlevel yourusername 3
This creates a new account with administrator privileges (GM level 3). You can now connect to your server using a WoW 3.3.5a client by editing your realmlist.wtf file to point to your server's IP address.
💡 Pro Tip: GM level 3 gives you full administrative access to all server commands, including bot management and world editing capabilities. For regular play, you might want to create additional accounts with GM level 0.
8. Configure Behavior of PlayerBots
Customizing Your AI Companions
One of the most exciting features of this setup is the PlayerBots system. Configure their behavior by editing the AI PlayerBot configuration:
nano /games/wow/cmangos/etc/aiplayerbot.confKey configuration options include:
- PlayerBot.Enable - Enable or disable the PlayerBot system (1 = enabled, 0 = disabled)
- PlayerBot.MaxBotsPerAccount - Maximum number of bots each account can control (recommended: 3-5)
- PlayerBot.AutoJoin - Whether bots automatically join nearby players (1 = yes, 0 = no)
- PlayerBot.Difficulty - Overall difficulty scaling for bot behavior (1.0 = normal, higher = harder)
- PlayerBot.XPRate - Experience rate for bots to level up with you (1.0 = normal rate)
Experiment with these settings to create the perfect balance for your playstyle. You can also configure individual bot behaviors through in-game commands once you're logged in.
Recommended Settings for Beginners:
- PlayerBot.Enable = 1
- PlayerBot.MaxBotsPerAccount = 3
- PlayerBot.AutoJoin = 0
- PlayerBot.Difficulty = 0.8
- PlayerBot.XPRate = 1.2
9. Connect the Bots to an AI
Setting Up the AI Backend
This is where the magic happens—connecting your PlayerBots to an AI system that enables natural, dynamic conversations. The AI integration transforms the bots from simple scripted entities into responsive, engaging companions.
First, install Python and the necessary AI libraries:
sudo apt install python3 python3-pip

pip3 install transformers torch flask
🤖 Understanding the AI Integration: The AI system processes player messages and generates contextually appropriate responses for the bots. This creates conversations that feel natural and dynamic, rather than using pre-scripted responses.
Creating the AI Interface
Create a simple Flask API that your bots can communicate with:
nano /games/wow/cmangos/ai_server.pyAdd the following basic structure (you'll need to customize this based on your chosen AI model):
from flask import Flask, request, jsonify

from transformers import pipeline

import threading

app = Flask(__name__)

# Load your AI model

chatbot = pipeline('text-generation', model='gpt2')

@app.route('/chat', methods=['POST'])

def chat():

    data = request.json

    message = data.get('message', '')

    character = data.get('character', '')


    # Generate response

    response = chatbot(f"{character} says: {message}", max_length=100)[0]['generated_text']


    return jsonify({'response': response})

if __name__ == '__main__':

    app.run(host='localhost', port=5000)
⚠️ Performance Note: Running AI models locally requires significant CPU resources. For better performance, consider using a cloud-based AI service or a more powerful machine for the AI server.
Configuring Bots to Use the AI
In your aiplayerbot.conf file, add or modify these settings:
PlayerBot.AI.Enable = 1

PlayerBot.AI.ServerURL = "http://localhost:5000/chat"

PlayerBot.AI.ResponseTime = 2000

PlayerBot.AI.Personality = "friendly adventurer"
Start your AI server in a separate terminal:
cd /games/wow/cmangos

python3 ai_server.py
🎉 AI Integration Complete! Your bots now have the ability to engage in dynamic, context-aware conversations. When you talk to them in-game, they'll send your message to the AI server, process it through the language model, and respond with generated text that feels natural and engaging.
Advanced AI Configuration
For more sophisticated AI interactions, consider these enhancements:
- Memory Systems - Implement memory systems that allow bots to remember previous conversations, creating persistent relationships over time.
- Personality Profiles - Create detailed personality profiles for different bot types—some friendly, some mysterious, some sarcastic.
- Context Awareness - Enhance the AI with context about location, current activities, and game state for more relevant responses.
- Voice Integration - Add text-to-speech capabilities to give your AI bots actual voices, making the experience even more immersive.
10. Bot Tools and Management
In-Game Commands
Once logged into your server, you can use various commands to control bots:
.bot add- Add a bot to your party.bot remove- Remove a bot from your party.bot list- List available bots.bot say [message]- Chat with your bots.bot follow- Make bots follow you.bot stay- Make bots stay in place
Bot Configuration Files
You can create detailed personality profiles for different bot types by creating configuration files in the /games/wow/cmangos/etc/bots/ directory. Each bot can have unique personality traits, speech patterns, and behaviors.
Example Bot Profile:
[BotProfile]

Name = "Elena the Brave"

Personality = "brave and loyal"

Class = "warrior"

LevelRange = "1-10"

ResponseStyle = "enthusiastic and encouraging"
Monitoring and Debugging
Check the bot logs regularly to ensure everything is working correctly:
tail -f /games/wow/cmangos/logs/bot.logThis will show you bot activities, AI interactions, and any errors that need attention.
Common Bot Issues:
- Bots not responding: Check that the AI server is running and accessible
- Bots not joining: Verify PlayerBot.AutoJoin setting and ensure you have available bot slots
- AI responses slow: Consider using a lighter AI model or upgrading your server hardware
- Bots stuck in place: Use
.bot followcommand or check pathfinding settings
Connecting to Your Server
Modifying Your WoW Client
With everything set up, you're ready to connect to your private WoW server:
- Install a clean World of Warcraft Wrath of the Lich King client (version 3.3.5a)
- Navigate to your WoW installation directory
- Find and edit the
realmlist.wtffile - Replace the contents with:
SET realmlist "your_server_ip" - Save the file and launch WoW
⚠️ Important: Make sure your WoW client matches version 3.3.5a exactly. Different versions will not be able to connect to your server.
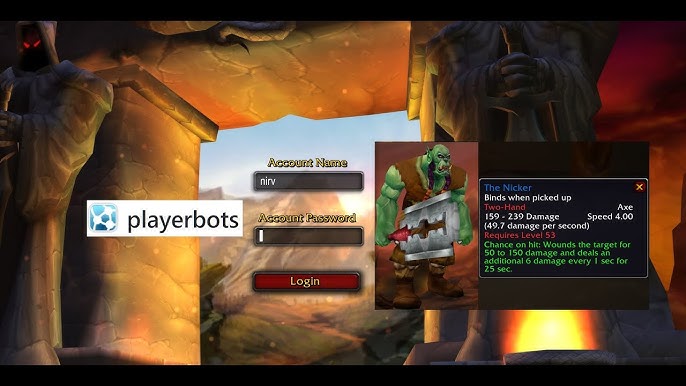
First Login Experience
Launch World of Warcraft and use the account credentials you created earlier. You should see your custom realm in the realm list. Select it and enter Azeroth—your private, AI-populated world awaits!
What to Expect:
- A familiar login screen but with your custom realm name
- Character creation screen with all races and classes available
- Once in-game, you can use
.bot addto summon AI companions - Type
.bot say helloto test the AI conversation system - Explore the world and watch as bots populate towns and cities
Performance Considerations
Hardware Requirements Scale
The performance requirements for your AI-powered WoW server scale with the number of bots and players:
Single Player + 5 Bots
- CPU: Dual-core 2GHz+
- RAM: 4GB minimum, 8GB recommended
- Network: 10Mbps+
5 Players + 25 Bots
- CPU: Quad-core 2.5GHz+
- RAM: 8GB minimum, 16GB recommended
- Network: 25Mbps+
10+ Players + 50+ Bots
- CPU: 6-core 3GHz+
- RAM: 16GB minimum, 32GB recommended
- Network: 50Mbps+
Optimization Tips:
- Use SSD storage for faster database access
- Keep the AI server on a separate machine if possible
- Monitor CPU usage and reduce bot count if performance suffers
- Consider using lighter AI models for better response times
Troubleshooting Common Issues
Server Won't Start
- Check that MySQL is running:
sudo systemctl status mysql - If MySQL isn't running, start it with:
sudo systemctl start mysql - Verify database connections: Check your configuration files for correct database credentials
- Check port availability: Ensure ports 3306 (MySQL), 8085 (world server), and 3724 (auth server) are not blocked
- Review log files:
tail -f /games/wow/cmangos/logs/mangosd.logandtail -f /games/wow/cmangos/logs/realmd.log
MySQL Connection Errors
- "Access denied" errors: Verify your MySQL user credentials in configuration files
- "Can't connect to MySQL server: Check if MySQL is running and listening on the correct port
- Connection blocked: MySQL may block clients after too many failed attempts. Reset with:
sudo mysql -e "FLUSH HOSTS;" - Permission issues: Ensure your wow user has proper database privileges
Client Connection Issues
- "Unable to connect to realm list": Check that realmd is running and your realmlist.wtf file has the correct IP
- Stuck at "Connecting to game server": Verify your realm configuration in the database
- Firewall blocking connections: Temporarily disable firewall with
sudo ufw disableto test - Wrong client version: Ensure you're using WoW client version 3.3.5a exactly
PlayerBots Not Working
- Bots not responding: Verify PlayerBots was enabled during compilation with
-DBUILD_PLAYERBOTS=ON - Configuration issues: Check
/games/wow/cmangos/etc/aiplayerbot.conffor correct settings - Bot commands not working: Ensure you have GM level 3 or use
.bot addinstead ofplayerbot add - Bots not joining party: Check
PlayerBot.AutoJoinsetting and ensure you have available bot slots - AI server connection: Verify your Flask AI server is running on port 5000
Getting Help
If you're still having issues, these resources can help:
- Official CMangos Documentation: cmangos.net/wiki
- CMangos Forums: getmangos.eu/forums
- GitHub Issues: github.com/cmangos/issues
- PlayerBots Repository: github.com/cmangos/playerbots
💡 Pro Tip: When asking for help, always provide your Ubuntu version, CMangos commit hash, and relevant error messages from the log files.
Conclusion
Congratulations! You've successfully built a private World of Warcraft server with AI-powered PlayerBots that can transform your solo gaming experience into something truly magical. What you've accomplished is remarkable:
- ✅ A fully functional Wrath of the Lich King private server
- ✅ AI companions that can join you on adventures
- ✅ Natural language conversations with your bot companions
- ✅ Complete control over your gaming experience
- ✅ A foundation for endless customization and expansion
What's Next?
Your journey doesn't end here. Consider these exciting enhancements:
- 🎮 Custom Content - Create custom quests, dungeons, and events using the GM commands and world editing tools.
- 🤖 Advanced AI - Upgrade your AI models with more sophisticated language models for even better conversations.
- 🌐 Multi-Realm Setup - Expand to multiple realms with different rule sets and populations.
- 📱 Web Interface - Build a web dashboard for server management, player statistics, and bot configuration.
Remember that this setup is for educational purposes and personal enjoyment. The world of private server development offers endless opportunities for learning about game development, AI integration, database management, and system administration. Whether you're exploring Azeroth alone with your AI companions or sharing the experience with friends, you've created something truly special.
Happy adventuring in your own personal Azeroth! 🎮✨
Document Version: 1.0 | Last Updated: 2024 | Compatible with: Ubuntu 24.04 LTS, CMangos WotLK, PlayerBots
This guide is provided for educational purposes. Please respect Blizzard Entertainment's intellectual property rights.